Getting Started You will have to remove the bed because the C-sections
go on top of the frame and there is no way to get the bolts in it with the bed on.
This isn't bad, but you will need at least one more strong arm to help you lift it
off. My 15 year old son and I lifted mine off and put it back on, but it was a
strain on him, and me too before I forget. Anyway, to get the bed off, you have 8
bolts holding it that will have to be removed. You will need to unplug the light
harness at the back. The gas filler hoses will need to be removed. I took the
whole thing loose from the bed on both sides. It's held on with 3 screws.
There is also a ground strap. I took the ground strap loose and removed the screws,
then kinked the hose over and tied the filler out of the way. I guess you could take
the rubber hose off just as easy if you like. The last thing is the clamp for the
differential vent hose, which is clamped to the bed. After all this is off or loose,
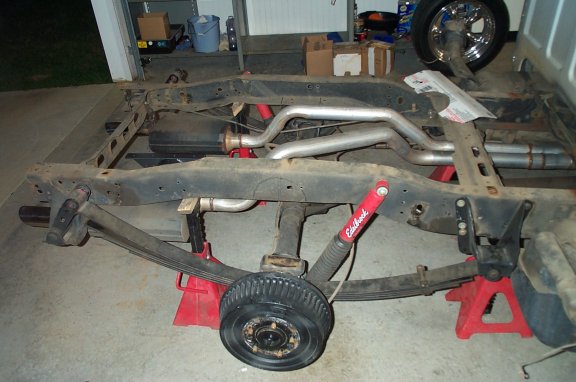
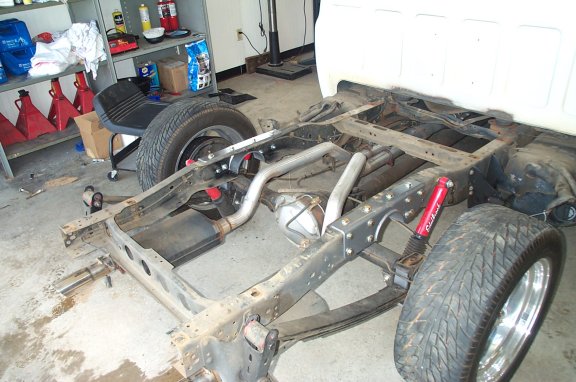
you can set the bed off. Piece of cake, right? Now, Let's Cut Up The Frame Cutting the notches in the frame is one of the hardest things of this, but it's not bad. Remove the tires and wheels, and raise it up on some jackstands. The frame needs to be supported in front of the axle and behind it. You will need two sets of jackstands for this. Don't think about cutting the frame without this support.
So, after getting the bed off, wheels and tires, and putting it on jackstands, it's time to mark the frame and start cutting. In the pic above, you see where I've marked mine. You also can see the piece of cardboard I used to mark it with. I used the c-section to make a pattern. It's much easier to mark the fram with this over the c-section itself. Remember, when making the pattern, if you mark the inside radius of the circle, don't forget to make around 1/2" bigger all the way around to take into account the thickness of the metal and where the welds are on the backside. You want the c-section to fit as tight as possible to the frame. Anyway, once the pattern is made, use a square of some sort to square down off the frame above the axle center. This is important. You want to make sure the axle is in the center of the notch when done. Take your time and do it right. Once the radius is marked, use the square to marke the bottom of the frame square back from the frame side. For easier cutting, I put my mark for this on the top side of the fram bottom, so I could see it when cutting from on top. So now, what tool to use to cut it with? I used a sawzall, but a small side grinder will work too. Don't use a cutting torch. It will overheat the frame and may make it weak. Do one side at a time. After getting it cut, test fit the c-section and make sure it fits against the frame good and tight. The c-sections are not marked as to which side they go on, but you can tell if you have it on the right side or not.
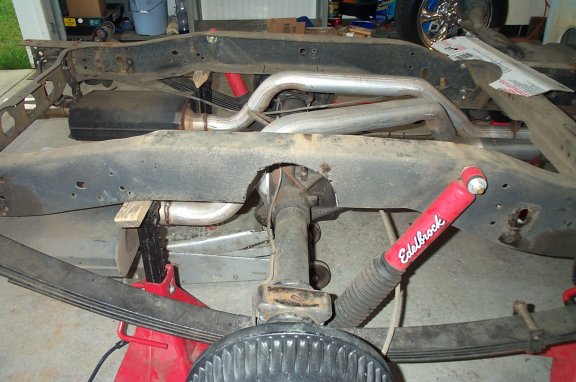
Once it fits, clamp it in place. Now before starting with the drill, do yourself a big favor, and use a new, good quality drill bit. It needs to be 1/2" in size. You have quite a few holes to drill, so don't waste your time with a sorry drill bit. It's hard enough with a new one. Use the c-section itself as a guide for drilling. When you get one drilled, but the bolt in to make sure it fits. After two or three are drilled, put the washers and nuts on and tighten them down. You can remove the clamp now as the bolts will hold. Finish drilling and and put all the bolts, washers, and nuts on this side. Tighten them all down good and tight, and finish before moving to the other side.
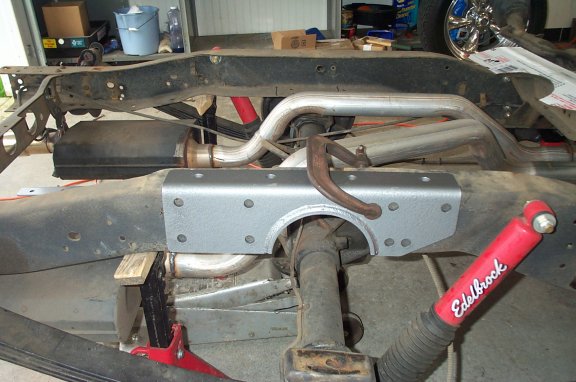
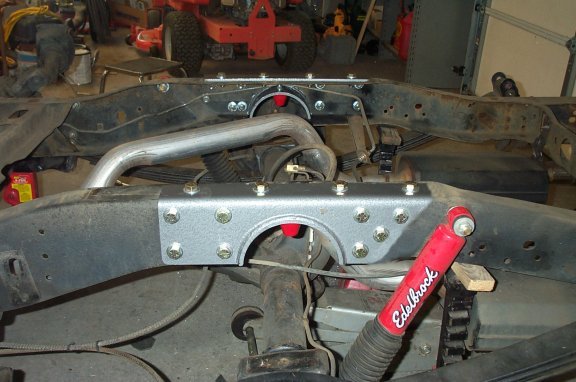
It might look in the pics below, I have mine on the wrong side. Well I'm not really sure, I tried both on the passenger side and either would work, but when I tried them on the drivers side, where I thought the one below, with the two bolts real close to each other was supposed to go, it didn't fit right to me. The sharp corner stuck out into the shock area and would hit, or so it seemed to me. So I put the one in the first pic below, on the passenger side. Now for the other one to work on the drivers side, I had to cut it off some. I marked it at where the flat of the frame stopped and the slope for the shock space started, as in the second pic below.
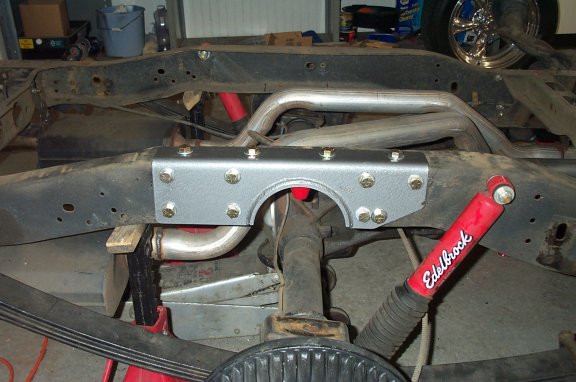
If you compare the pic above to the one below, you can very clearly see the corner would have hit the shock. So, the pic below is how mine turned out on the drivers side after cutting it off and redrilling the holes in it. I'm not sure if they are all this way or not. I didn't like the way either worked on the passenger side, the one I thought was supposed to fit the drivers side, didn't. So, I made it work. Not hard to do and I am satisfied with the fit now. I hope yours doesn't end up this way.
So, anyway, do the other side the same way and call it good. Make absolutely positive you have all the bolts tight. Now you can put the tires and wheels back on, and set her back on the ground. Putting the bed back on is the reverse of removal.
Hope it goes well for you. Good luck with it.
|