Written by: Mike Ervin Written by: Mike Ervin
I replaced my stock bench seat with a three piece combo,
which consisted of bucket seats and a center seat/console. The center console worked
OK, but I have wanted a floor shifter for a while. I decided I wanted to install a
B&M MegaShifter and the center seat was going to be in the way. So, what to
do? I decided to build a new center console that more suited my needs, plus I could
also use the MegaShifter like I wanted to do. During my thought process, trying to
figure out what exactly I needed, I came up with the idea to build a new rear speaker box
and tie it into the new center console. This article will be about the console part
of my project. This was a rather tough thing to build because I had no plans to go
by and had to do everything by a lot of test fitting and trimming. I think it turned
real nice.
Building the console to go with the speaker box.
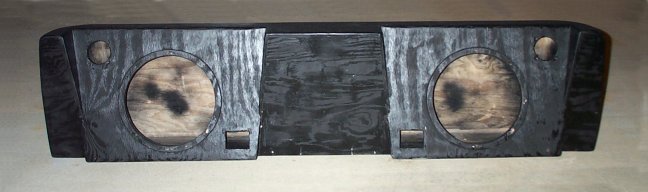
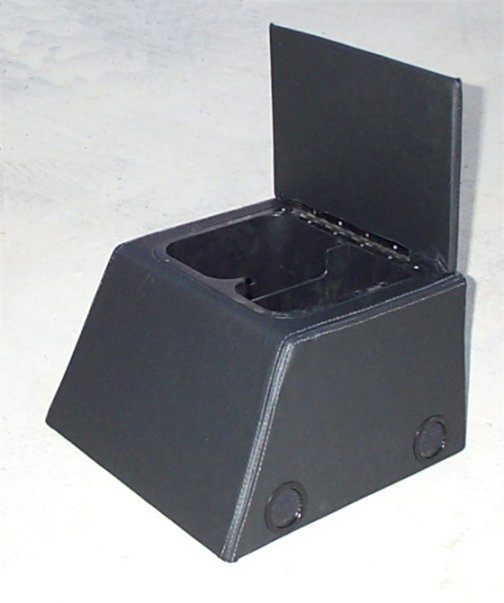
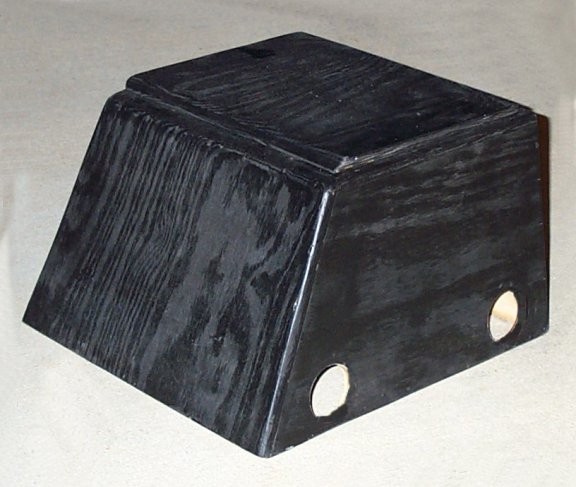
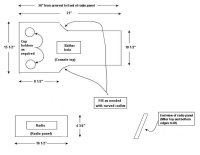
After I thought about what I wanted the speaker box to
look like, then this determined what I had to do with the console. The photo below
is how the box looks. This will help give you an idea of what the console will look
like where it meets the box.
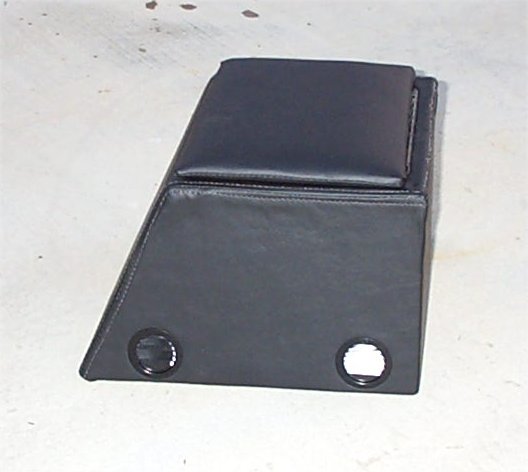
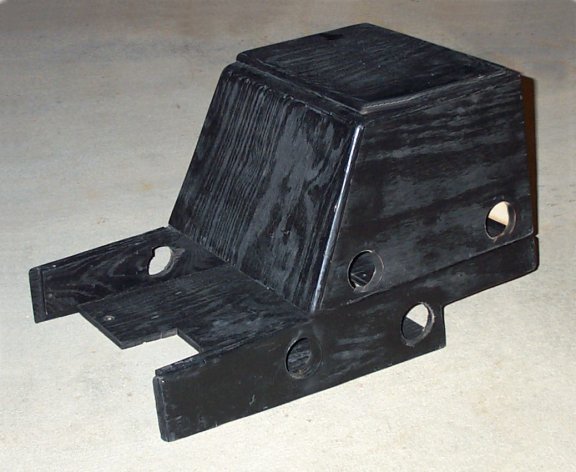
Here is a photo of my completed console.
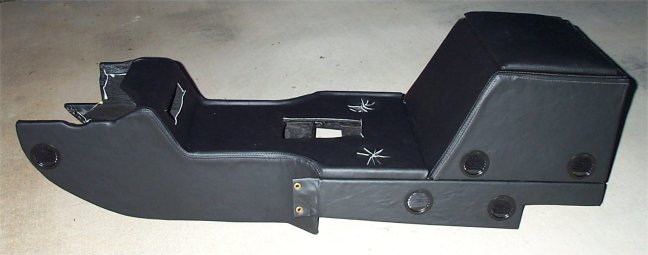
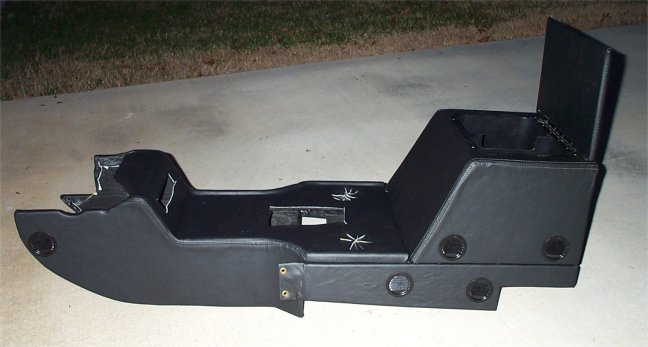
Here a few pics of the console after having it
upholstered.
In order to be able to install and remove the console
from the truck, I had to build it in three sections. Below is some photos of these
sections.
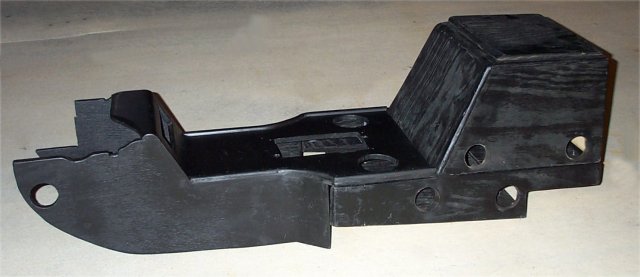
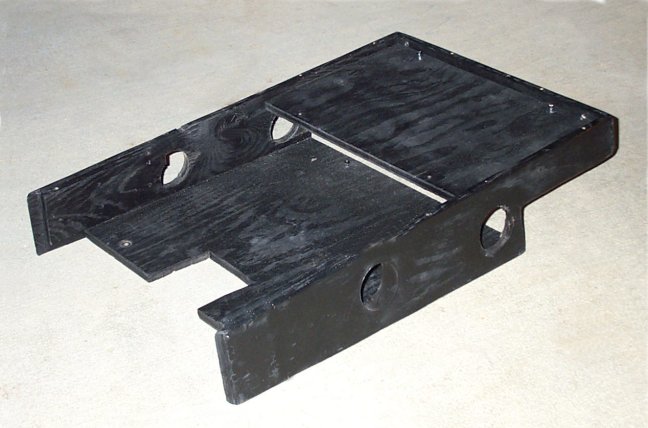
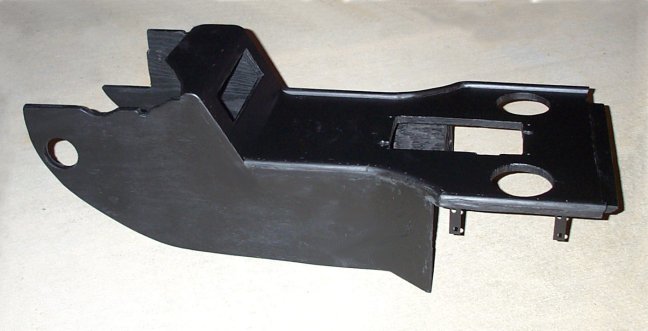
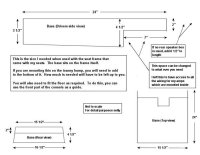
- This is a pic of the base. This is the part which
mounts on my seat frame and is under the armrest box. Why is it built this
way? Well, I have two amps and needed somewhere for them to go. The second
photo below will show you what I mean.
- The base with explanations of what everything is for.
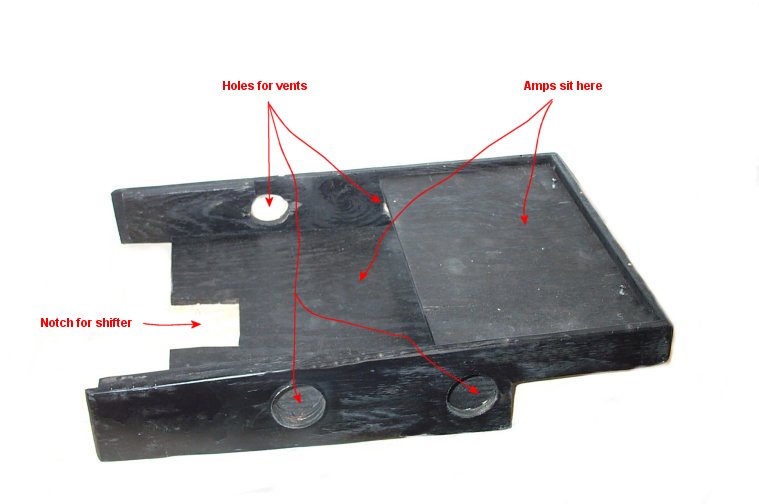
- Another of the base and explanations.

I used 1/2" BC grade plywood to build everything out
of. Now, let me say, the above base is built the way it is because of the seat frame
that came with my aftermarket seats. The base sits on the frame and not the truck
floor itself. You will probably be need it to be different, unless you have seats
like mine. So, I have drawings for both styles.
Here are more photos of the other two sections for the
console.
- Armrest sitting on the base.
- This is the front part of the console and third piece of
the puzzle. As you can see in the photo below, I added some trim around the edge so
I could lay things on it and they wouldn't slide off in the floor. It's 3/4"
half round. For the curved part, I had to make some to match.
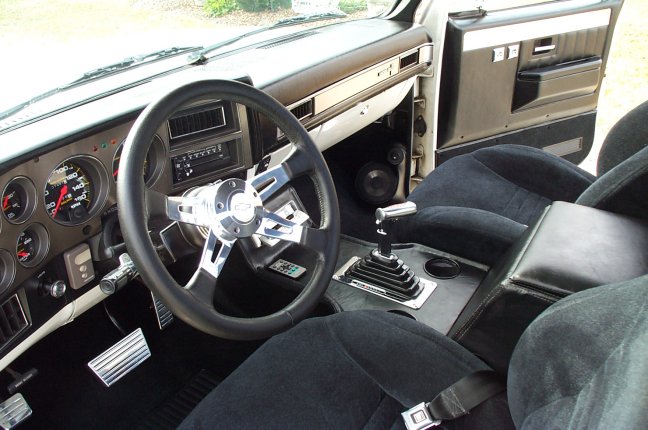
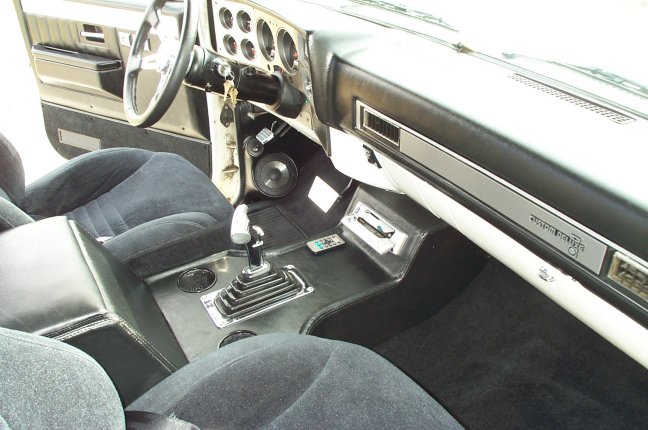
- Here is a couple pics of the finished console in the
truck. For more pics of the finished product, check this page.
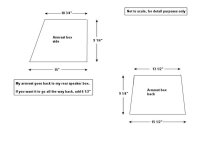
Now for all the drawings I made of the console.
Click on the drawings below to go to the full size ones you can print out.
- This drawing is the armrest box. I didn't make a
drawing of the box lid because mine is made to fit a plastic bin I had from an old seat
mounted console I bought at Walmart long ago.
- This drawing is for the base. This is the one you
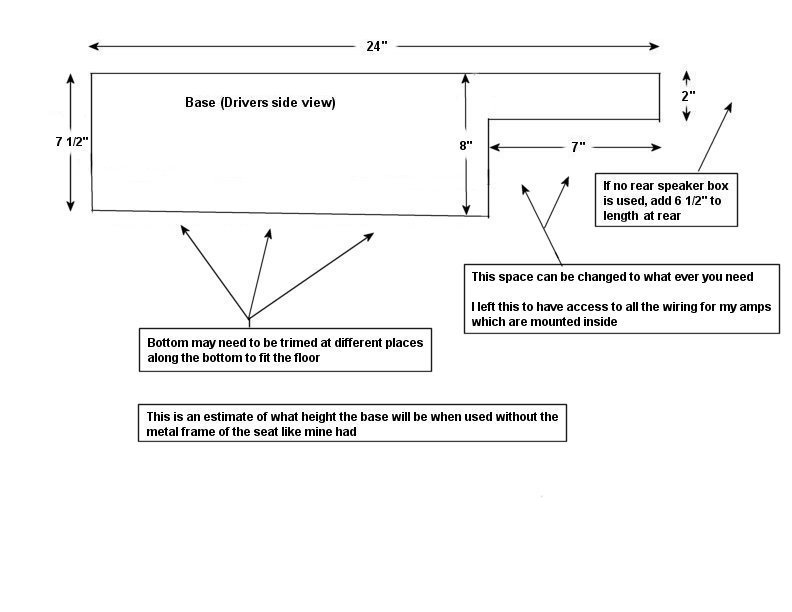
will use if you don't have the seat frame in you way like I did.

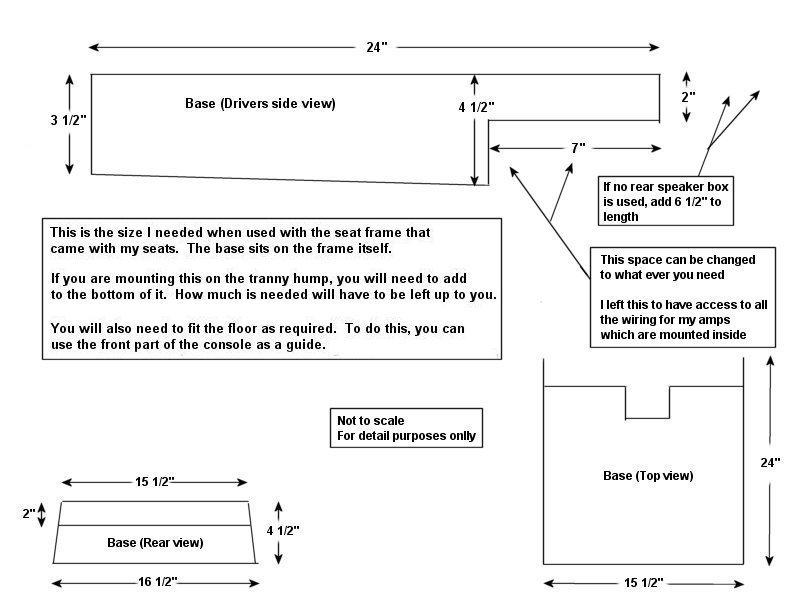
- Drawing for the base if you do have a frame and seats
like mine.
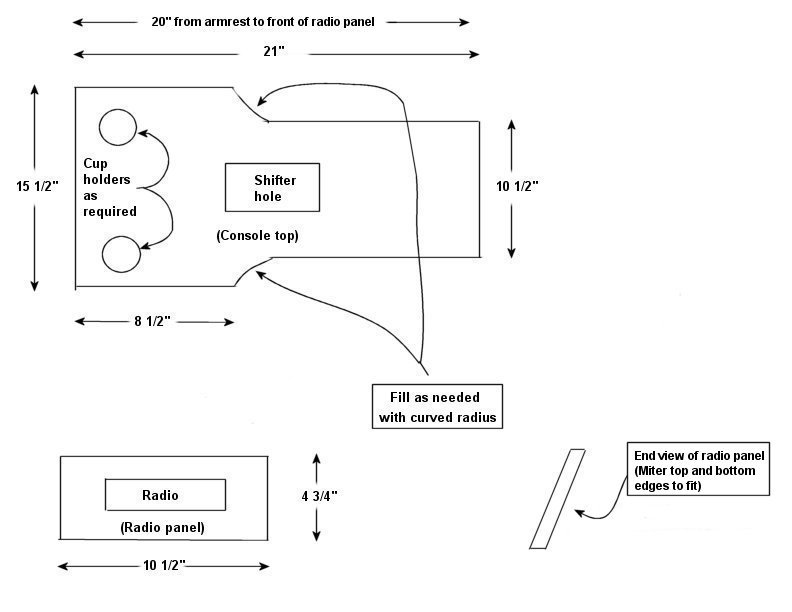
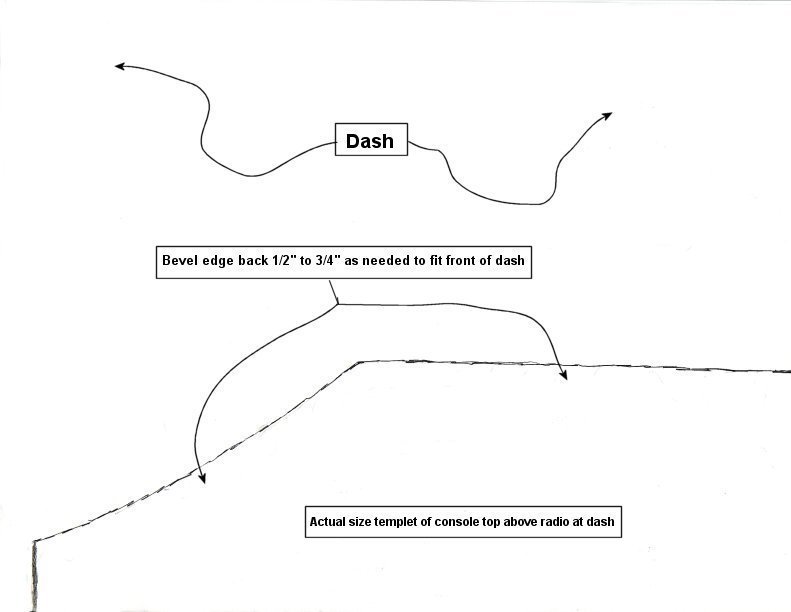
- Drawing for the console top.
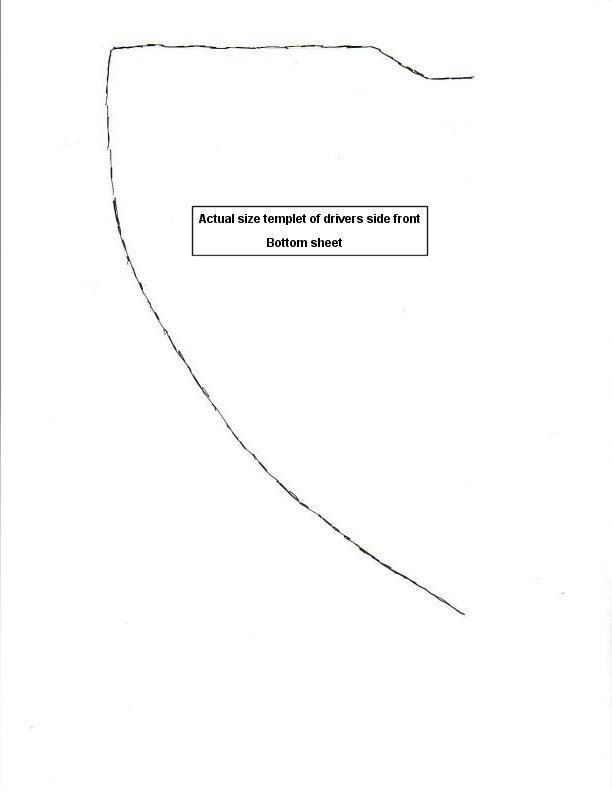
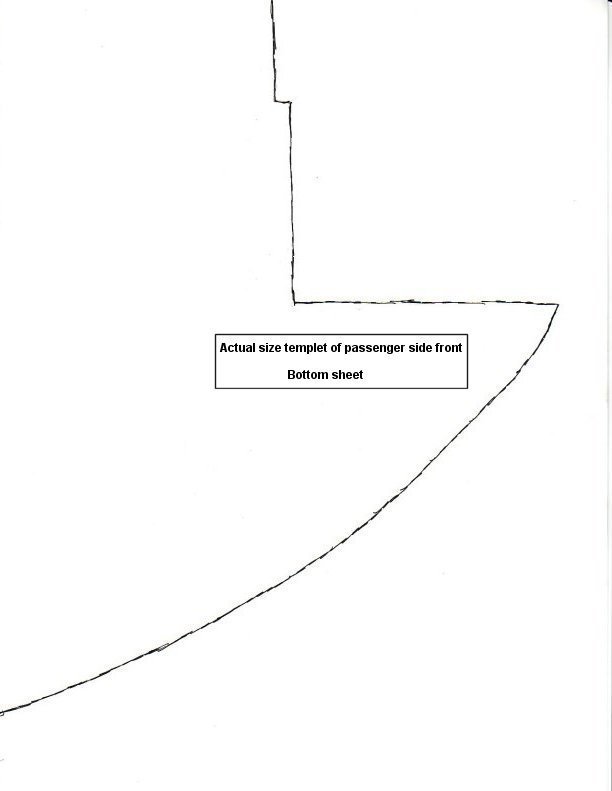
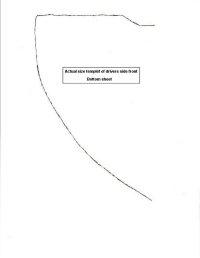
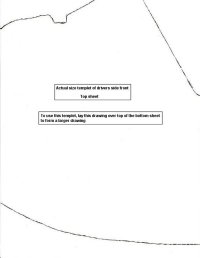
- Below are all the other drawings for rest. Some are
for actual size templets. The ones for the front part of the console, which goes
under the dash are two part templets. The way I have them you can print them out and
use the two pieces to make a larger templet you can use to trace the cutout.


This is all I have for now. It's real hard to
describe things about this to you and cover every detail. I think with the drawings
and photos, you will be able to build one for yourself. But, let me state this
before hand. It's not an easy job by any means. I am a Carpenter by profession
and it was a challenge to me. Of course, I didn't have anything to help me like this
article will you. It will come in real handy if you have some wood working skills
for sure.
Good luck with it.
Home
|