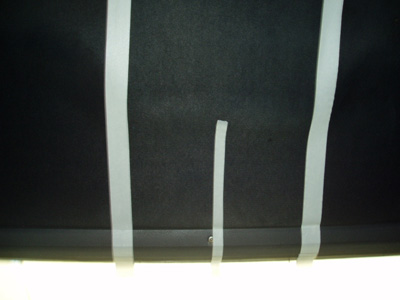
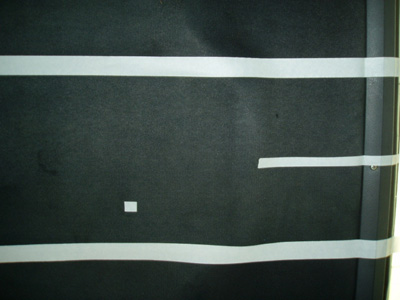
This is a how-to article explaining how to install a modern overhead console from a ‘90s GM Tahoe/Yukon or truck into a 73-87 GM truck. These consoles can be found at your local salvage yard or eBay, I purchased mine off eBay for $40. The first few things that needs to be done are to remove both sun visors, dome light housing and lens (remove interior light fuse at this time), all trim and moldings, and finally the headliner. Not all 73-87's are equipped with headliners, if yours isn't, then you saved yourself a little bit of work. Once the headliner has been removed, wipe down the surface of the roof to remove any dust and debris. Next, using some one inch masking tape, run a single strip the full length of the cab from the front to rear window following the embossed crease in the roof on each side, while keeping the tape line as straight as possible. This needs to be centered on the cab from left to right. To find the center of the cab roof, I used the screw that attaches the front metal trim that runs along the front of the windshield...it may not be true center, but it’s close enough for what where doing. If you want to ensure it is indeed centered, you can always make some measurements using a tape measure. Once finished, run another strip (1/4” is preferred) of masking tape from the previously mentioned hole back about twelve inches, this will be where the forward mount hole will be located. Note: Pictures shown below illustrate the tape lines with the headliner installed...headliner should indeed be removed prior to proceeding with the following steps.
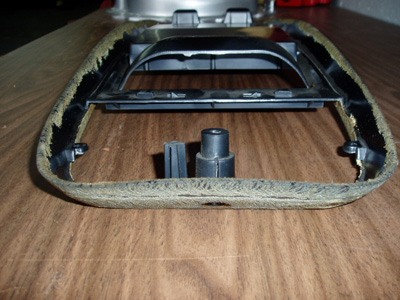
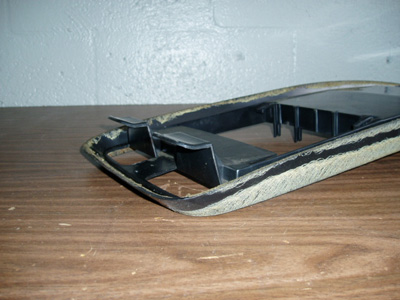
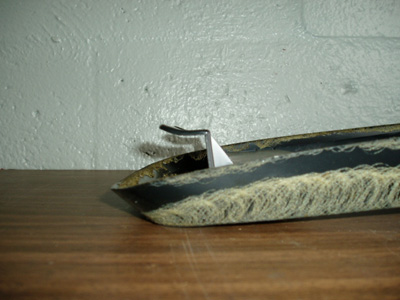
There is a position locater shaft at the front of the console next to the forward mount shaft that will need to be cut off so that the console will fit flush against the roof. Refer to picture and duplicate.
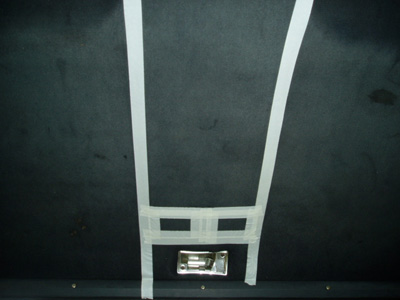
Next take the console and hold it to the roof center it up between the tape lines and find the best spot where it seems to fit the best, paying attention to the cab interior light so that it doesn’t interfere with it. Note: there will be some gaps between the console and the roof, this gap will not be there once the headliner is reinstalled. Now drill a hole into the roof for the forward mount screw using a drill bit smaller than the screw that you will be using to secure the console with. Use extreme caution when drilling into the roof, if you have a drill stop use it! If you do not have a drill stop, run some masking tape around the drill bit as an indicator so you will not to go through and hit the outer sheet metal and putting a dent in it. After you have the mount hole drilled, carefully screw the console to the roof, then position the back of the console so that it’s centered within the two tape lines on the roof. Next, use some masking tape and place it at the rear of the rear mounting tabs on the back of the console then go forward about 1.5” and tape off the roof so that there are two squares about 1.5”x 2” forward of the rear mounting tabs. Note: it is very important this step is understood because if you make a mistake here you cannot correct it.
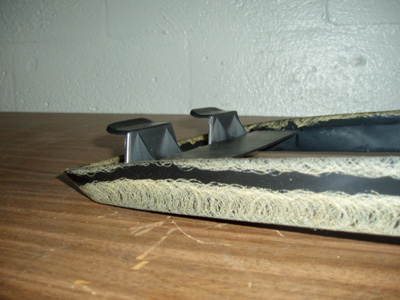
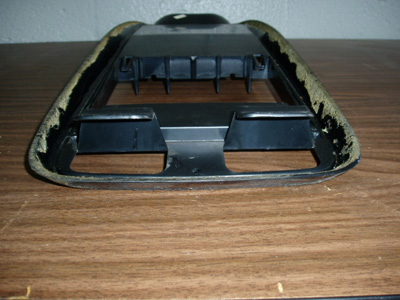
Now take a high speed cut off wheel and carefully cut the squares out in the roof, after you have them cut out, de-bur them with a file then paint the exposed metal to prevent rust or corrosion. Here are a few pics of the "tabs" on the console that will be inserted in the squares you just cut in your roof.
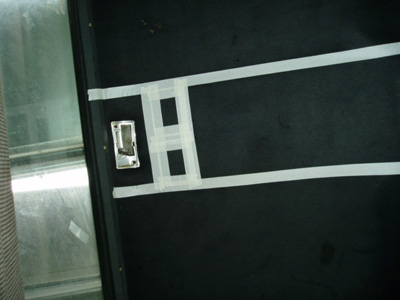
Now, take the console and tilt the front down and put the rear mount tabs into the holes in the roof, push the front up and line it up with the forward mounting hole, insert the front mounting screw securing the console to the roof. Check the fit to see if you need to make any adjustments to the rear mount holes, if every thing looks good, remove the console. Now you will need to make your electrical connection for the map lights. I used the factory connector for the console so if I need to remove it I can unhook it and take it down. I picked up power from the power feed to the dome light, reinstall the fuse, and use an ohm meter or test light to find out witch wire is the power feed. Next you will need to drill a hole for the power wire to pass through the cab roof, I used a 5/16” drill bit and I drilled the hole to the driver’s side of the interior light and installed a rubber grommet in it. The small square is where you should drill this hole.
Once you know which one is power, remove the fuse for the interior light, cut the wire, and pass the orange wire thru the drilled hole and splice it to the orange wire from the console harness. Next, use an eyelet on the black ground, securing it to the roof with a self tapping sheet metal screw. When finished, tape the harness to the roof and run it to about the middle of the cab. Now replace the interior light fuse and connect the harness to the console and check that the map light’s work. Now you will need to reinstall the head liner so that you can cut the holes in it for the rear mount tabs, forward mount screw, and the electrical connector. The small square is where you should cut the electrical connector hole.
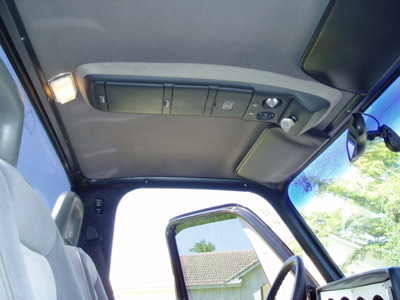
There is really no easy way to determine where the holes are once the headliner is re-installed. For the forward mount screw, I used a screw that I cut the head off of and threaded it in with the point facing out so I could just push it through the head liner. For the connector, I just guessed at where I though it should come out and cut a small square for it. For the two rear mount holes I took some measurements and used them to find the holes once the head liner was in place. I used a pick tool to punch thru the liner, enough to make an outline, then I removed the liner and marked the outlines with a marker and cut them out with a sharp razor blade. Reinstall the head liner, moldings, and sun visors. Now you will need to make some adjustments to the rear roof mount tab holes in order to take up the gap in between the console and roof. To do this you will need to push up on the roof at the rear only using a piece of wood or a screw driver handle. Once the roof is bent up, install the consol and check the fit...do this until there is no longer a gap. Once you are happy with how it fits, install the console for the final time, be sure to connect your wiring before you screw it to the roof. Here are a couple finished pictures of the console installed in my truck, use them as a reference should you wish to perform this modification to your truck. Good luck.
Note: If your truck does not have a head liner installed then some additional modifications to the overhead consol will be necessary in order to take up the gaps between the roof and console.
|