I replaced my stock bench seat with a three piece combo, which consisted of
bucket seats and a center seat/console. The center console worked OK, but I have
wanted a floor shifter for a while. I decided to install a B&M MegaShifter and
the center seat was in the way. So, what to do? I decided to build a new
center console that more suited my needs, plus I could also use the MegaShifter I
wanted. During my thought process, trying to figure out what exactly I needed, I
came up with the idea to build a new rear speaker box and tie it into the new center
console. So, this will be entirely based on my new project. I will have plenty
of photos and detailed drawings with measurements. Some of this will need to be
reworked to fit the needs of anyone who decides to do something similar to this. I
hope it helps you some. It is a lot of work, but what isn't if it turns out
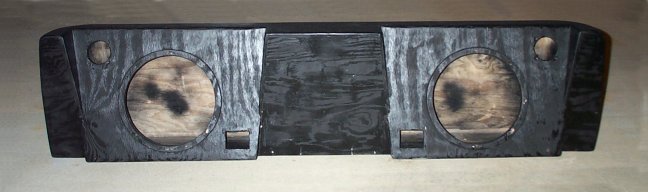
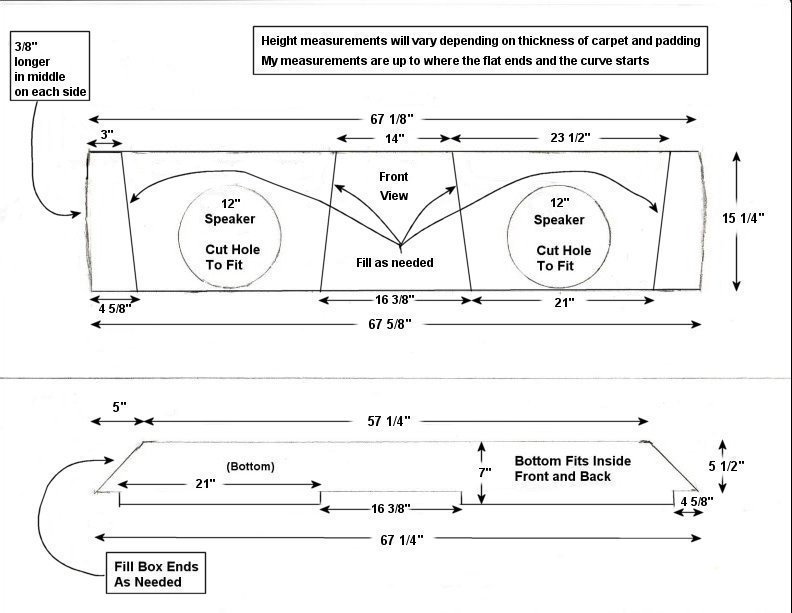
nice? Now, let's get started. Building the rear speaker box. I wanted my new box to go all the way from one side to
the other. I also wanted it to fit snug behind the weather stripping at the doors so
there wouldn't be a gap after the box was in place. So, the box will fit tight
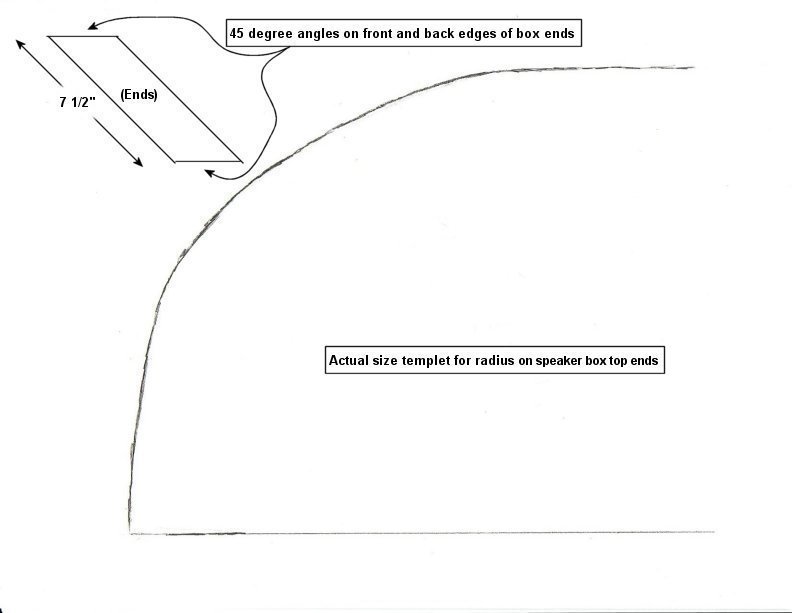
between the sides, and go up to where the flat back panel ends and the curve starts.
It will also fit the ends where they are round on top. You see in these photos I
have the speaker boards laid back on a tilt. This is to gain as much room as
possible for my seats. I used 12" subwoofers and tweeters. In the bottom
corners is where I put the speaker terminals. In the upper corners I installed some
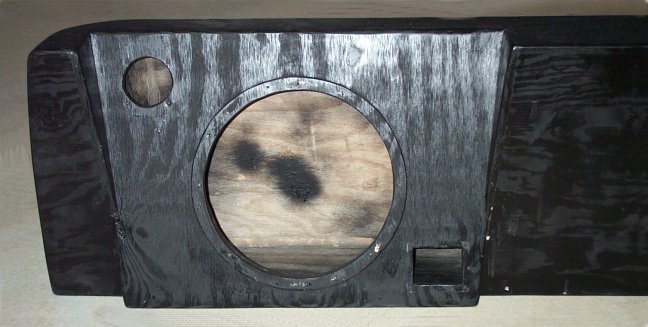
Radio Shack tweeters. Here is a pic of the of the finished box before having it upholstered.
Here is a closeup of what I did to gain more room for my seats.
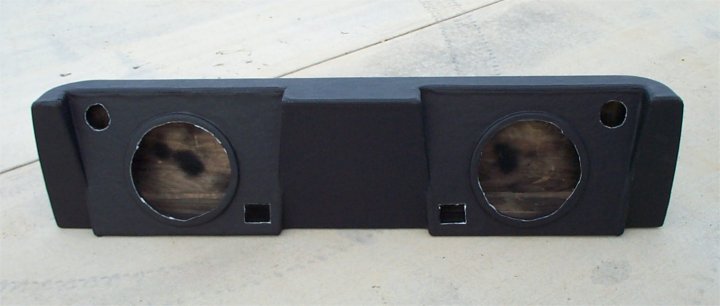
Here is one after having it upholstered. Looks better don't it?
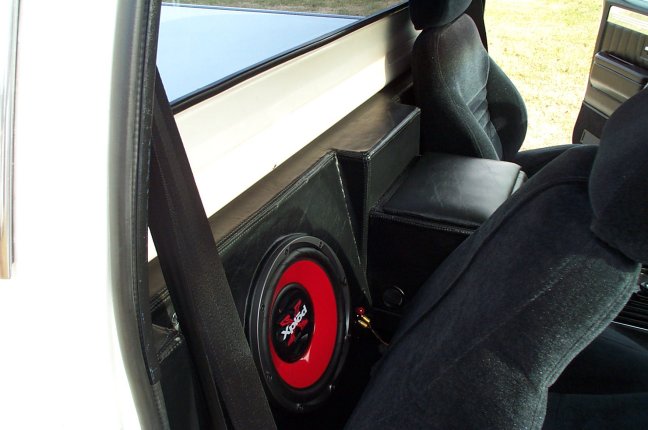
Here's another of the box installed in the truck.
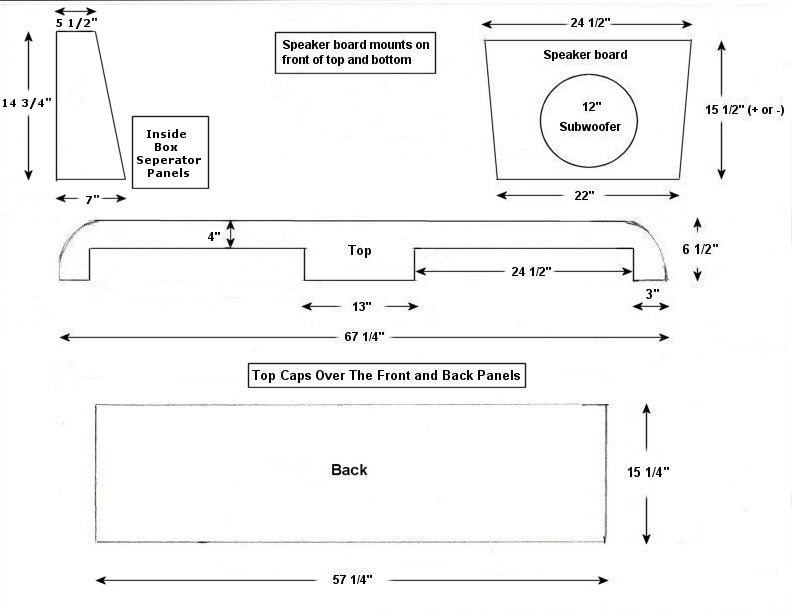
So to do all this, I took a lot of measurements and
thought a lot about what I wanted the final product to look like. These are the
drawings I made. Click on these to see actual size drawings which you can print out
and use if you like.
As far as what type of material I used, I went with 1/2" BC grade plywood. I thought about using 3/4", but this would have taken up more of the box volume. 1/2" is plenty thick for this purpose. Also with the internal bracing of the divider panels help to stiffen the box front to back it is more than enough. In the photos of the box, you see a ring around the speaker holes. I sort of messed up a little here. I had ordered my Sony Xplod subs. Before they came I had already built the box. I estimated at how much I needed for them to fit. Well, as luck would have it, I didn't have enough. I had to add another 1/2" or redo the box. So, I made these rings to move them out this 1/2" instead of tearing it redoing the box. Works great and looks pretty good this way. For the measurements I have take into consideration the difference in the 1/2", so the ring won't be needed. But, if you use different subs, you will need to make allowance for the depth needed for them. I have no way of knowing these measurements, so you will be on your own with this. I plan on getting everything covered with black vinyl to match the rest of my interior. My seats are velour, but everything else is vinyl. I would go with leather, but it wouldn't look right unless I done everything with it. I hope this helps you with a box build if you decide to
build it with the center console. Here is a
link to the console article I have also.
|